Sunday, February 22, 2009

When the Moon Hits Your Eye...

Well, if I didn't know exactly how hard cooking was, I certainly do now. I had my genius idea to bake up a nice Greek Vegetarian Pizza as a nice surprise for my family. But before I begin my step by step directions, I would like to caution my fellow beginner cooks not to make your own dough. The recipe seemed simple enough- 1 cup of all purpose flour, 1 1/2 teaspoons of baking powder, 1/2 teaspoon of salt, and 1 cup of hot water. This simple dough recipe ended up in an impromptu-mid preparation-oven on trip to the local grocery store!

Greek Vegetarian Pizza

Ingredients

1 (12 inch) pre-baked pizza crust,
1/2 cup prepared basil pesto
3/4 cup sun-dried tomatoes packed in oil
1/2 cup sliced black olives
3 cups torn spinach leaves
1/2 red onion, quartered and thinly sliced
1 cup crumbled feta cheese
2 teaspoons dried oregano
1 tablespoon olive oil
2 tablespoons grated Parmesan cheese

Directions

Step 1:
Preheat the oven to 450F/ 230C

Step 2:
Place dough on baking sheet and spread into 12" pizza crust


Step 3:
Spread pesto onto pizza crust. Top pizza in the following order: tomatoes, spinach, red onion, black olives, feta, and oregano

Step 4:
Bake until spinach starts to wilt and cheese starts to brown. About 15 minutes

Step 5:
Remove pizza from oven. Sprinkle with olive oil and Parmesan cheese

Step 6:
Slice and Enjoy!

I must have sorted through at least 10 different recipes in order to find one that I thought I could manage. The directions, as you can see, are not too hard to follow and the ingredients preparation was a snap. However, making a pizza with no help, well my little brother was here laughing through my endeavour, I was not exactly sure when I was to take the pizza out. The directions instructed me to leave it in for about 15 minutes, but after about 45 minutes, I still didn't know if it was cooked thoroughly. I baked the pizza for a total of 50 minutes before I took it out. But to my surprise, my pizza was a hit! Besides the fact that I don't like sun dried tomatoes, the pizza was very tasty. Of the five people who live in my house, including myself, my pizza got a rating of 3.5 out of a possible 5 stars. That's amore!

Oh, I almost forgot to show you MY pizza dough...

Yeah, that whole spinning the pizza in the air idea just didn't work out!

Friday, February 20, 2009

Rapini...just like cooking: An Acquired Taste

I don't know if anyone even noticed, but the introduction to my last post was written in past tense. You see, my Dad is newly retired and has decided that he too would like to take on the challenge of cooking! So, for a nice family dinner we decided to make an Italian pasta dish. The main ingredient was rapini. Although rapini is a good source of Vitamins A, C, and K, it has a very distinct taste that may not sit well with all pasta connoisseurs.

Pasta with Rapini

Ingredients
1/2 cup olive oil
4 large cloves garlic, minced
2 pounds rapini (broccoli rabe)
Salt and pepper to taste
2 tablespoons balsamic vinegar
1 pound medium-sized pasta
Crushed red pepper (optional)
Freshly grated Parmesan cheese

Directions

We strayed from these directions on the website because after talking to may aunt, we learned of the way my grandmother used to make this dish. First, we got out a big pot and filled it to about 3/4 with water and added in the cut rapini (you know you have enough water if the rapini is submerged completely). Then we placed the pot on medium heat to boil. As the pot was boiling, in a separate pan we heated the 1/2 cup of olive oil over medium heat. Instead of mincing the garlic, I remembered the garlic press my mom always uses for her pasta sauce and so we used that to save us some time. In the heated pan, along with olive oil, we combined the pressed garlic, salt and pepper, and balsamic vinegar. That mixture, after turning down the heat, just sat on the stove to simmer. The water came to a boil and so, in went a box of penne. So now, the pasta was cooking in the same pot as the rapini. If you've ever cooked spaghetti before, you may know the trick-if you throw a sting of spaghetti and it sticks to the cupboard, it's ready- however, this trick does not work with penne (I learned by continuously throwing a piece of penne, that would not stick, at the cupboard as my dad fervently looked on). So instead, I just ate piece of penne and decided it was cooked. As we strained the cooked penne and rapini, we saved a little water to be used for the sauce. In a large bowl, we put the penne and rapini, and covered the pasta with our olive oil mixture. Not everyone in our house enjoys spicy food, so we served the chili peppers as well as the Parmesan cheese on the side!

Every new dish I cook seems to come easier and easier. I'm now looking forward to cooking more complex recipes with a little less help from others!

Tuesday, February 10, 2009

Barbecuing: A Man's Domain?

I grew up in a household which may not be too unfamiliar to many other people. My mom was in charge of the kitchen, meaning she cooked pretty much every meal that came out of that room. My dad, on the other hand, was the "barbecuer." He prepared the meat and took it outside to the grill. Personally, I've never really understood how barbecuing is seen to be a man's job. Let's look a bit further, shall we.

The term "barbecue" has no exact origin, but most scholars agree that it is a derivative of the West Indian word "barbacoa," a method of slow cooking over hot coals. For a more extensive reading on the etymology of the word "barbecue," visit this graduate paper. Next, come in the manly men. According to The Independent UK, a character trait called "The Flintstone Factor" is the reason men feel the need to be in charge of the barbecue. The article goes on to state that "a hidden primeval instinct as a caveman hunter-gatherer makes [men] seize control of the barbecue.." Another psychologist, Dr. Aric Sigman, concludes that a barbecue is one of the few opportunities left for a man to "satisfy his love of gadgets and to recreate the cave-side ritual" (Barbecue Survey: Calor).

So let's see where we're at. Men love barbecuing because it brings them back to prehistoric times and it also allows them to fool around with tongs and propane tanks. Ok, well now we have the perspective of a man, let me give this barbie a try!

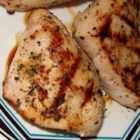
Jenny's Grilled Chicken Breasts

Ingredients

4 skinless, boneless chicken breast halves
1/2 cup lemon juice
1/2 teaspoon onion powder
Ground black pepper to taste
Seasoning salt to taste
2 teaspoons dried parsley

Directions

Before I give directions on how to grill up these chicken breasts, I'd like to share my first barbecue experience. Well, it was just this past summer that my brother got the bright idea that we should barbecue up some steaks. I don't even like steak all that much, but hey, we were hungry and bored. So, my brother defrosts the steaks and starts seasoning them as he instructs me to go turn the barbecue on. I have never turned a barbecue on so I kindly ask him to instruct me and he replies, and I quote, "turn the propane on, turn both dials to, like, 9 o'clock, and then turn the ignitor." Alright, I go to the barbecue, turn the propane on, turn both dials to, like, 9 o'clock, and then pause. At this point, I was a little bit scared that a big ball of flame would come shooting up once I turned that ignitor. Don't you hate it when you're right? Luckily, as I turned the ignitor, I also turned my face away. The barbecue successfully singed all the hair off of my right arm. In case you were all worried, I started the barbecue.

But I digress. I combined all of the ingredients into a seal-able bowl. I shook the bowl to mix the ingredients and then let the chicken marinate for about 20 minutes. In the mean time, I went outside (opened the garage door and put the barbecue at the edge) and attempted to ignite the barbecue once again. Just to make sure everything went well, I asked my Dad to give me instructions for the barbecue. His instructions were pretty much the same, except, he told me to turn the dials to 3 o'clock. Big difference! When the grill was hot enough, I placed the four chicken breasts to cook. The directions said to grill 10-15 minutes each side, or until no longer pink and juice runs clear. I, however, just kept flipping the chicken breasts because I had a handy meat thermometre!

In case I hurt anyone's feelings, here are some pictures of really awesome barbecues!


Images from Life in the Fast Lane

Tuesday, February 3, 2009

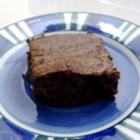
Super Brownies

My friends and I got together for a little Superbowl "party." This party consisted of a variety of chips and chip dips, talking during the first 7/8 of the game, and then, of course, we watched the final two minutes of the game because God forbid we didn't see who won. Oh, and the most important part of our entire night were my made-from-scratch deep dish brownies!!

Deep Dish Brownies

Ingredients

3/4 cup butter, melted
1 1/2 cups white sugar
1 1/2 teaspoons vanilla extract
3 eggs
3/4 cup all-purpose flour
1/2 cup unsweetened cocoa powder
1/2 teaspoon baking powder
1/2 teaspoon salt

Directions

Well, first of all, I baked these brownies in the foreign kitchen that belonged to my friend, Andrea. I thought I had a pretty efficient oven/stove, but I was introduced to stainless steel heaven. I swear it had a button for everything you could think of, every baker's dream, no doubt! I typed in 350 degrees and the oven began to preheat. I neatly aligned all of the ingredients that I brought to make these brownies. On a side note, you think that shopping for a few common items at your local grocery store would be a breeze. I guess I encountered a wind storm because it took me 30 minutes to find THREE items I didn't have (cocoa powder, baking powder, and flour). Back to baking. I stared at the instructions for a good five minutes to make sure that I was going to do everything right, since this was the first thing I've ever baked. I had two bowls: one large bowl and one medium sized bowl. The directions instructed me to combine the melted butter, sugar, vanilla, and eggs in one bowl and the flour, cocoa powder, baking powder, and salt into another. So, as I stood there, I was certain that I should put the egg mixture into the larger bowl and the powder mixture into the medium sized bowl. I was so certain in fact, that I argued with Andrea about my correctness and made a fool of myself as it turned out I was wrong. Oops! So I carefully blended the egg mixture with the powder. I poured the mixture into a greased 8 inch pan and placed it into the oven.

Now is it just me, or is the best part of baking brownies licking the bowl and spoons clean? We all huddled around the bowl and seriously licked every last drop of chocolaty goodness. I was a little bit preoccupied with my baking brownies though. The instructions told me to bake for 45 minutes. I was up in the kitchen every two and a half minutes to make sure nothing was burning. After the 45 minutes, I used the old toothpick trick (stick a clean toothpick into your baked goods and if it comes out clean, then it's ready) and decided to take them out. By this time, there was the most intoxicating aroma in the house that we didn't even wait until the brownies cooled. Surprisingly, my brownies were delicious, a little gooey inside and crisp around the edges. I'll give myself an A+++